Creating an outline of a PNG picture in Adobe Illustrator involves tracing the image to convert it from a raster graphic to a vector graphic. Here’s a step-by-step guide on how to do this:
👍Also Read:
1. Open Adobe Illustrator
Launch the program and create a new document by going to File > New or by pressing Ctrl+N (Windows) or Cmd+N (Mac).
2. Place the PNG Image
Insert the PNG image into your Illustrator document by going to File > Place, then select the PNG file from your computer. Click Place and click on your artboard to insert the image.
3. Lock the PNG Layer
It’s often a good idea to lock the layer that contains your PNG image to prevent any accidental modifications. To do this, open the Layers panel (Window > Layers), click on the empty box next to the ‘eye’ icon on the layer that contains your PNG. A lock icon will appear, indicating the layer is locked.
4. Create a New Layer for the Outline
In the Layers panel, create a new layer by clicking on the “Create New Layer” button. This is where you’ll work on the outline to keep it separate from the original image.
5. Use the Image Trace Feature
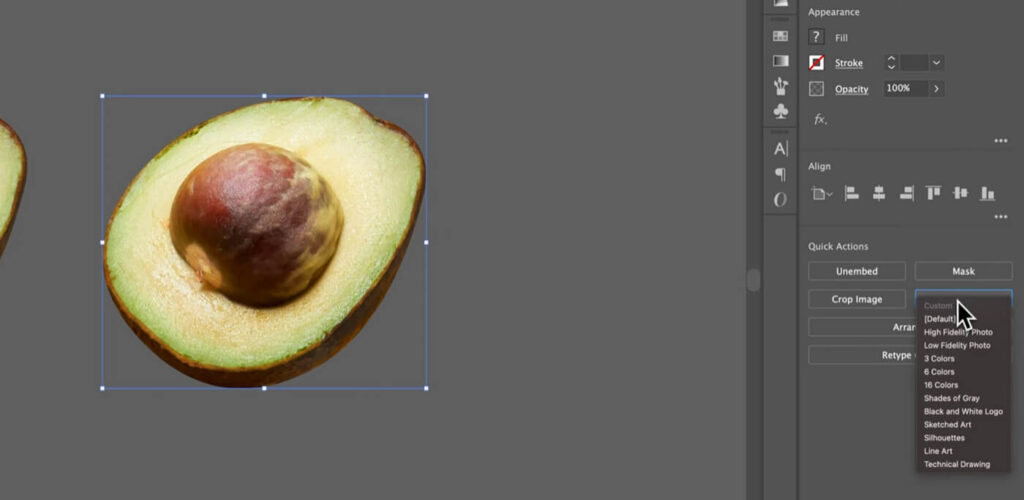
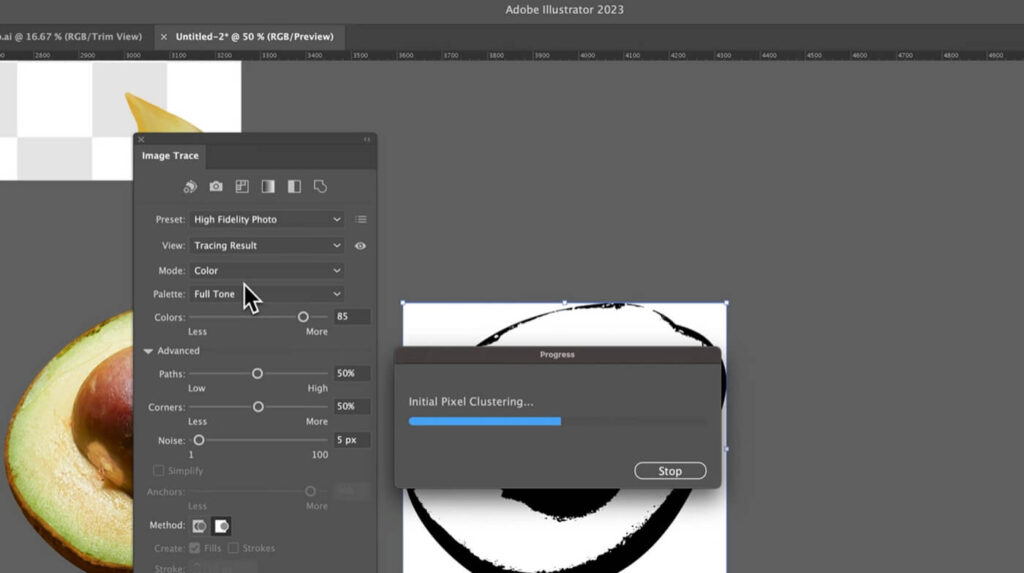
With the PNG image selected, go to the Window > Image Trace to open the Image Trace panel. Here, you can choose a preset that best matches the type of image you’re working with. For instance, if you’re tracing an outline, you might start with the Silhouettes preset.
6. Adjust Image Trace Settings
Adjust the settings in the Image Trace panel to get the outline effect you want. You can modify the Threshold to determine how much of the image is converted into black and white, and adjust Paths, Corners, and Noise to refine the trace. Use the Preview checkbox to see the changes in real time.
7. Trace the Image
Once you’re satisfied with the settings, click the Trace button to convert the PNG image into a vector outline.
8. Expand the Traced Image
After tracing, you need to expand the image to turn it into actual vector paths. With the traced image still selected, go to Object > Expand. In the dialog box that appears, make sure both Fill and Stroke are checked, and then click OK.
9. Clean Up the Outline
Use the Direct Selection Tool (A) to click on parts of the outline you want to modify or delete. You can remove unwanted parts, adjust anchor points, and fine-tune the path to get a clean outline.
10. Save Your Work
Once you’re happy with the outline, save your document by going to File > Save As. Choose the appropriate format for your needs, such as Adobe Illustrator (.ai) for further editing or Scalable Vector Graphics (.svg) for web use.
Remember that the Image Trace feature works best with high-contrast images. If your PNG has a lot of colors or is very detailed, you may need to clean up the image in a raster-based program like Adobe Photoshop before tracing it in Illustrator to get the best results.
FAQs
What is the Image Trace feature in Adobe Illustrator?
The Image Trace feature in Adobe Illustrator converts raster images (like PNGs) into vector graphics. This feature offers various presets and settings to help achieve the desired vectorization.
Which preset should I use to create an outline of a PNG image?
To create an outline, you can use the “Outline” preset in the Image Trace panel. This preset simplifies the image to black outlines, making it suitable for creating vector outlines from a PNG.
How can I adjust the Image Trace settings for better results?
In the Image Trace panel, you can adjust settings such as threshold, paths, corners, and noise to refine the tracing result. Enabling the “Preview” option allows you to see changes in real-time.
What should I do after tracing the image to finalize the vector outline?
After tracing the image, click the “Expand” button to convert the tracing object into editable paths. This step allows you to manually edit the vector graphic further.
How can I ensure that only the outlines are visible in the final vector graphic?
To ensure only the outlines are visible, set the fill to none and adjust the stroke color and width as needed. This can be done after expanding the traced image.
Can I manually trace a PNG image instead of using Image Trace?
Yes, you can manually trace a PNG image using Illustrator’s drawing tools, such as the Pen tool. This method provides more control and creative freedom but is more time-consuming compared to using the Image Trace feature.

