
Stable Diffusion is one of the best AI art generators, and it has become the go-to for many for its powerful features and open-source nature.
On this page, you’ll find detailed step-by-step and illustrated guides on how to install Stable Diffusion locally on Windows, Mac, and Linux. We’ve tried to introduce the easiest ways possible.
Stable Diffusion relies on a web UI to be run locally, we’ll be using Automatic1111’s WebUI, which is a well-received optimized fork of Stability-AI’s official release.
Note that installing Stable Diffusion on a computer or mobile is a complicated process and it requires technical and Python coding skills.
👍 You are also recommended to try Stable-Diffusion-based websites to save the troubles and create AI art instantly.
Table of Contents
How to Install Stable Diffusion on Windows
To install Stable Diffusion on Windows, you need to ensure your PC meets the minimum system requirements, which typically include running Windows 10 or later, having at least 16GB of system memory (RAM), and a discrete GPU with at least 4GB VRAM.
👉Also Read: How to Use Stable Diffusion without NSFW Filter
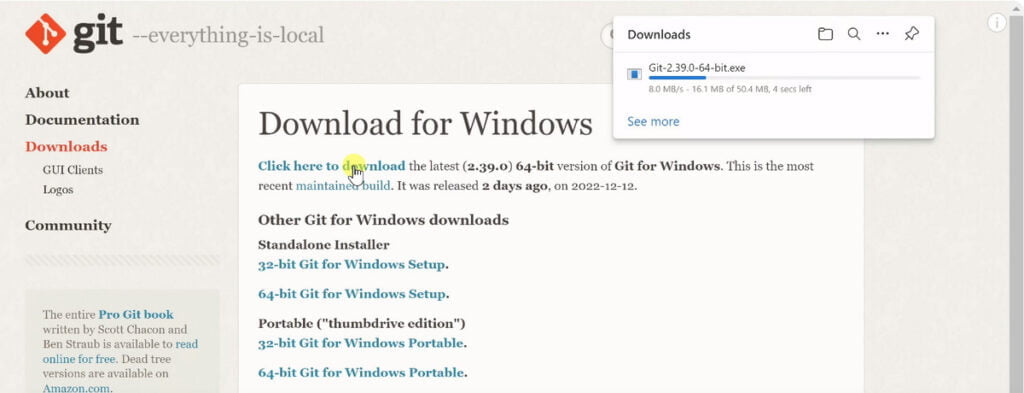
1. You will need Python (preferably version 3.10) and Git installed on your system. During the Python installation, make sure to add python.exe to the system’s PATH.
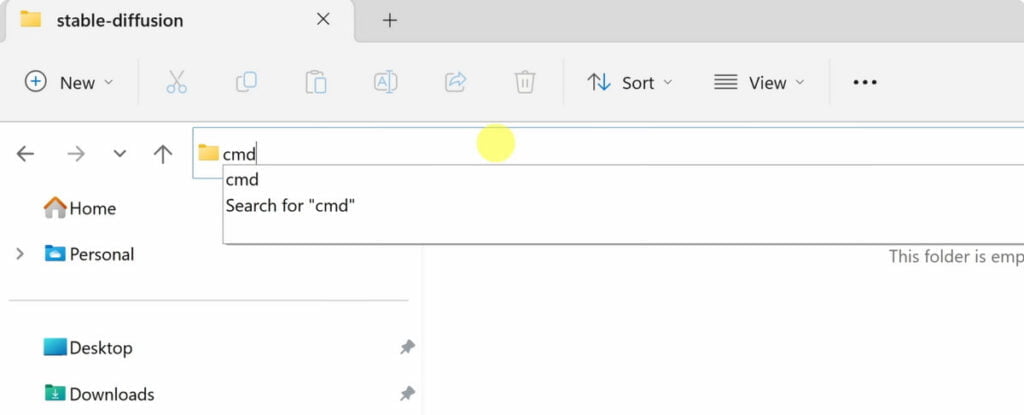
2. Go to File Explorer and create a folder named stable-diffusion, and enter the folder. From there, type in CMD to the file explorer address bar, and press Enter on the keyboard to open the command prompt.
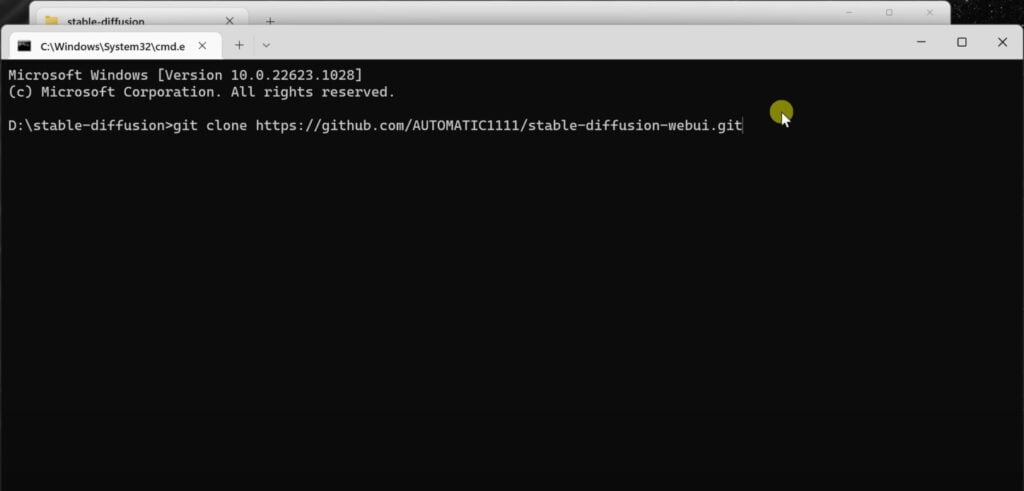
3. Use Git to clone the Stable Diffusion WebUI repository by running the following command in the command prompt: git clone https://github.com/AUTOMATIC1111/stable-diffusion-webui.
4. You will need to download a Stable Diffusion model file. Trusted sources include Civitai.com and Hugging Face.
👉For LoRA and checkpoint recommendations, refer to our list of the best Stable Diffusion models.

5. Navigate to the folder where you cloned the repository. Run webui-user.bat, which will open a command prompt window and start setting up the WebUI.

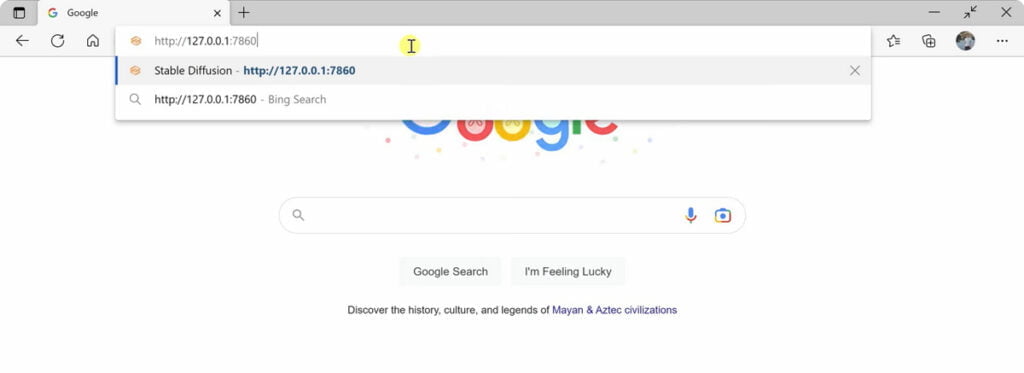
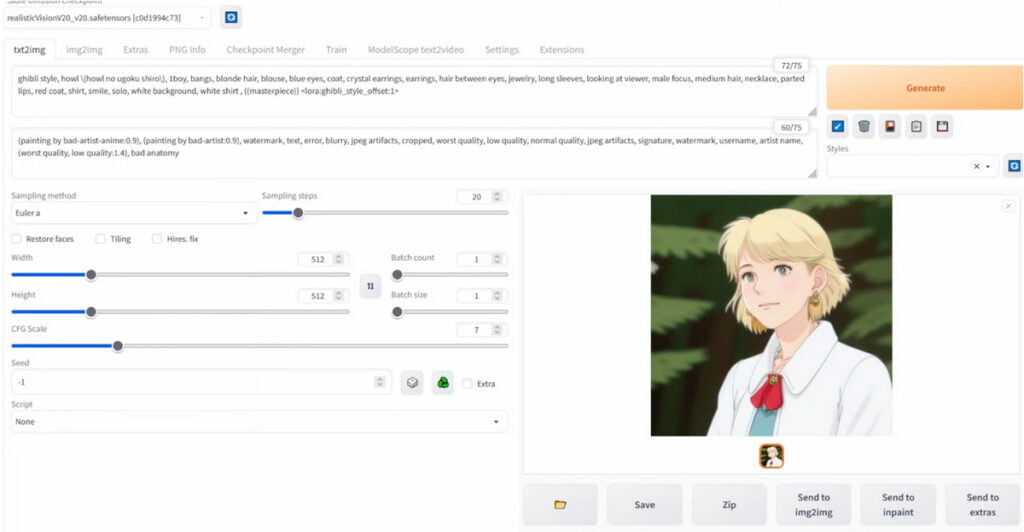
6. Once the setup is complete, open your web browser and go to http://127.0.0.1:7860/. You should see the AUTOMATIC1111 WebUI interface where you can input prompts and generate images.
7. Input a prompt (e.g., “a Ghibli-style girl”) and hit Generate to test if Stable Diffusion is running correctly.
8. When you are done using Stable Diffusion, close the command prompt window to shut down the application. To rerun Stable Diffusion, you will need to double-click the webui-user.bat file again.
⚠️Remember to check the documentation provided with the specific version of Stable Diffusion you are installing for any additional or updated steps.
How to Install Stable Diffusion on Mac
To install Stable Diffusion on a Mac, you need to ensure that your system meets the necessary requirements.
These include having a Mac OS 12.5.1 or above, an Apple Silicon Mac model (M1 or M2 chip is recommended), and at least 8 GB of RAM, although 16 GB is preferred for optimal performance.
Using Homebrew
Homebrew is a free and open-source software package management system that simplifies the Stable Diffusion on macOS.
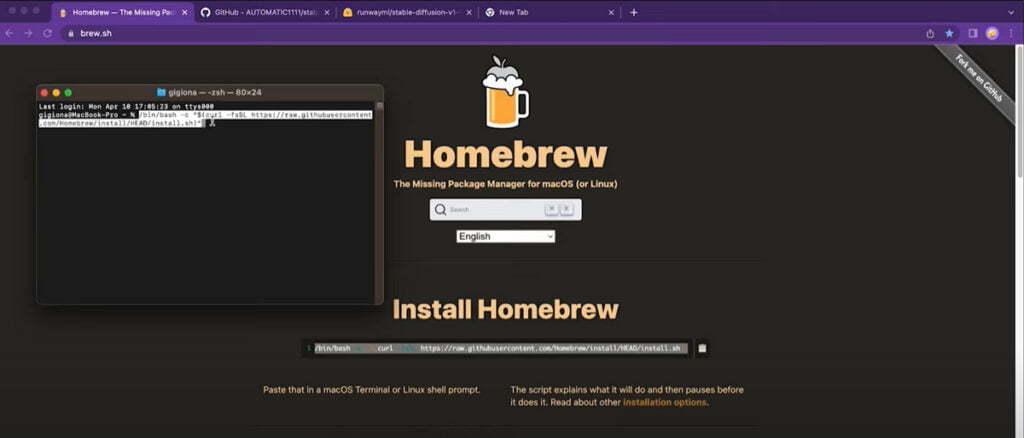
1. If you haven’t already installed Homebrew, open the Terminal app and type the following command, then press return:
sh
/bin/bash -c "$(curl -fsSL https://raw.githubusercontent.com/Homebrew/install/HEAD/install.sh)"
This will install Homebrew on your Mac.
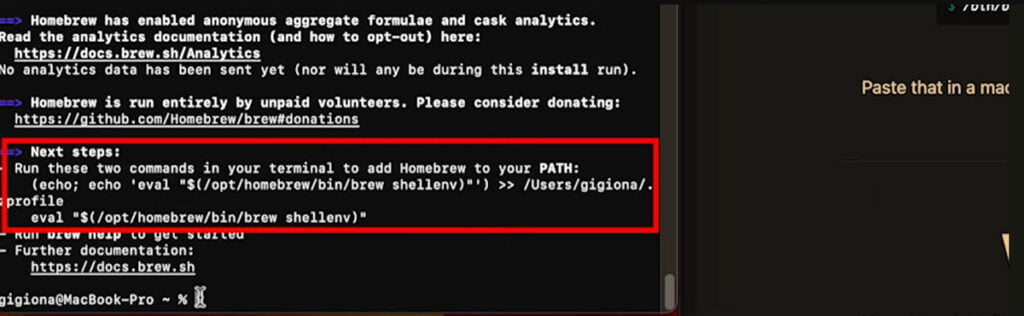
2. Copy and run the generated code to specify the path of Homebrew installed programs. Its beginning should look like this:
echo 'eval $(/opt/homebrew/bin/brew shellenv)' >> /YOURPATH/
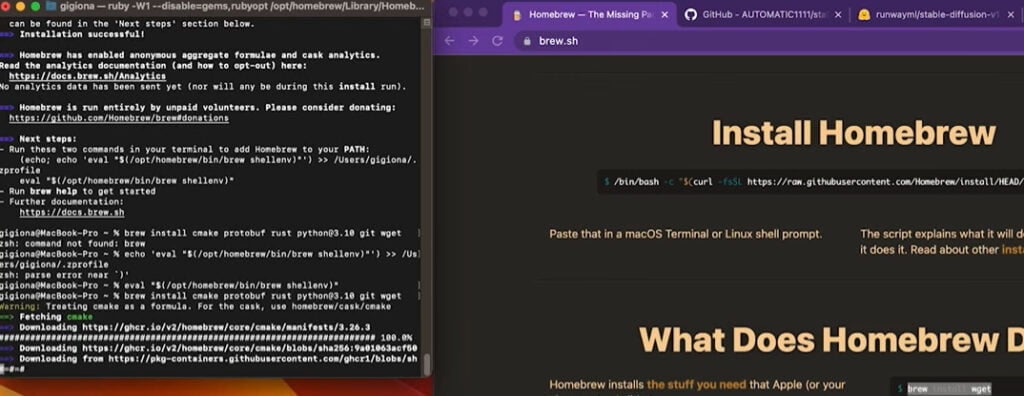
3. Once Homebrew is installed, you need to install some dependencies. Open a new terminal window and run the following command:
sh
brew install cmake protobuf rust python@3.10 git wget
This will install the necessary packages to run Stable Diffusion.
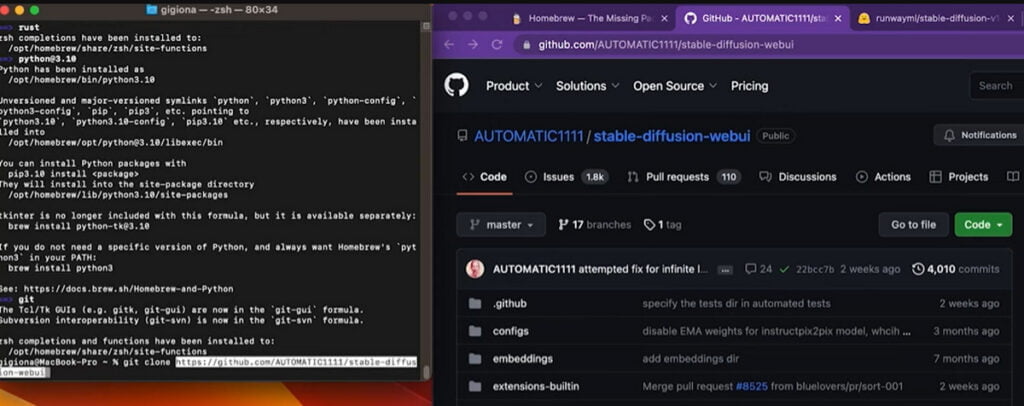
4. Clone the web UI repository by running the following command in the terminal:
sh
git clone https://github.com/AUTOMATIC1111/stable-diffusion-webui
A new folder stable-diffusion-webui should be created under your home directory. Then type open . to go to that folder.
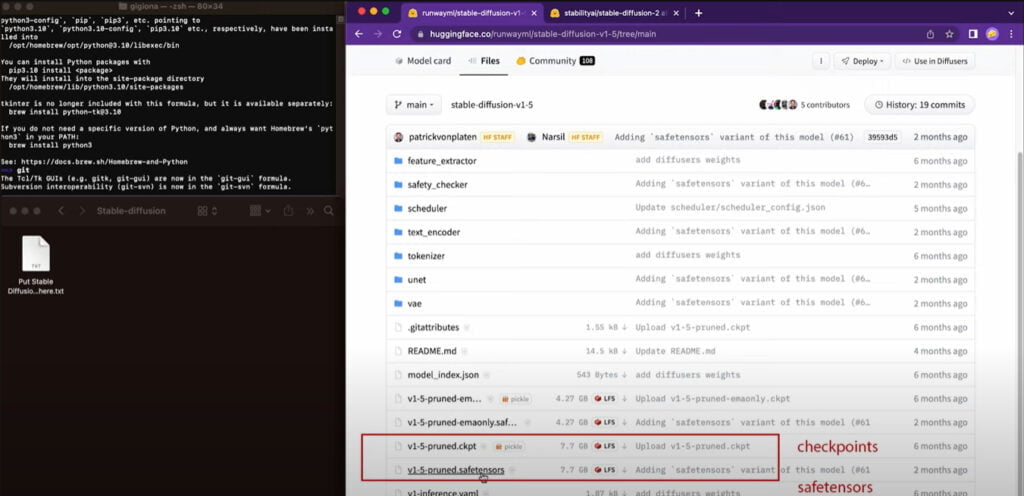
5. Go to stable-diffusion-webui > models > Stable diffusion, and place your models downloaded from Hugging Face or Civitai there.
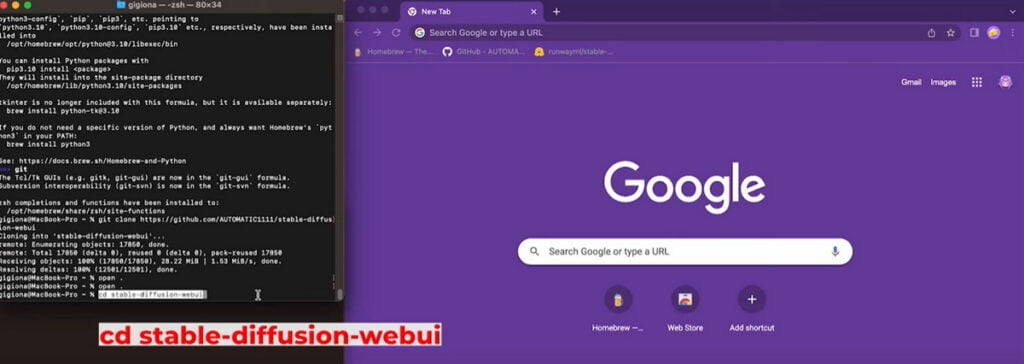
6. Use the cd (change directory) command to navigate to the stable-diffusion-webui directory. Replace path_to_directory with the actual path to the directory on your system:
sh
cd path_to_directory/stable-diffusion-webui
This command will make stable-diffusion-webui your current working directory.
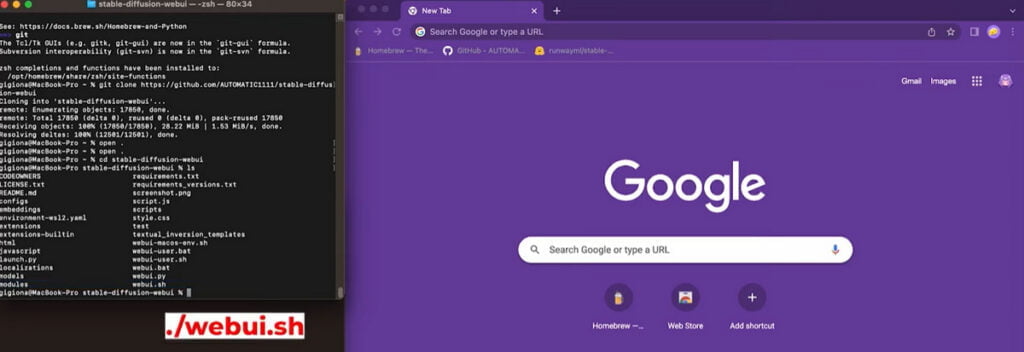
7. Once you’re in the stable-diffusion-webui directory, you can start the web UI by running the webui.sh script. This can be done with the following command:
sh
./webui.sh
This command will start the web UI.
⚠️Please note that these commands should be run in the Terminal app on your Mac. If you encounter any issues, make sure that you have the necessary permissions to execute the webui.sh script. If necessary, you can add execution permissions to the script with the following command:
sh
chmod +x webui.sh
This command allows the webui.sh script to be executed.
Using Diffusion Bee
Alternatively, if you prefer a simpler installation, you can use DiffusionBee, which is a GUI application that runs Stable Diffusion locally:
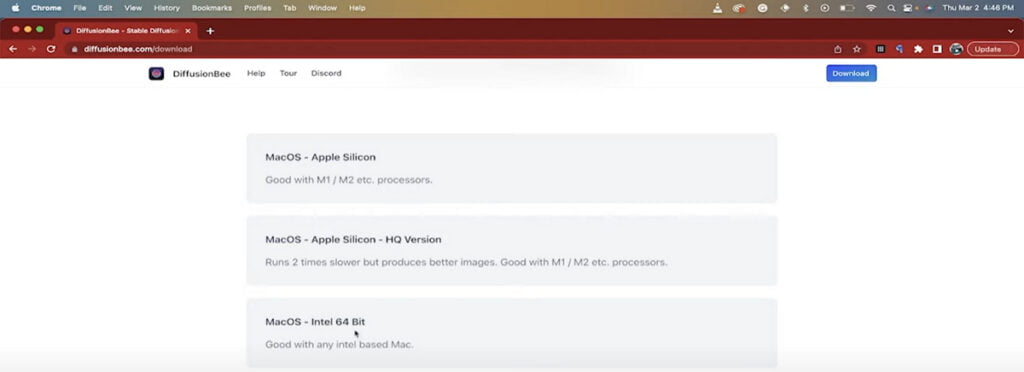
1. Go to the official DiffusionBee website to download the application.

2. Depending on your Mac type, select between the regular version, the Apple Silicon version (for newer Macs with M1/M2 chips), or the Intel version (for older Macs)
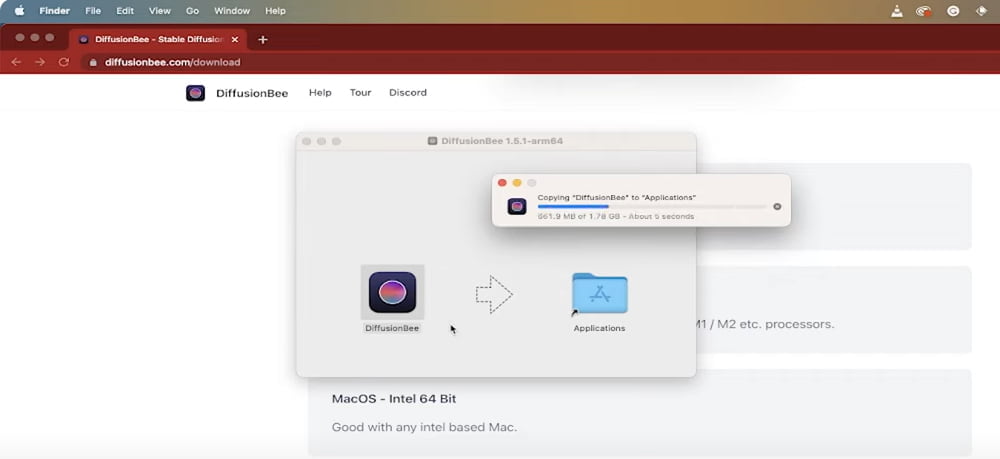
3. Drag the DiffusionBee icon to the Applications folder to complete the installation.
4. Use the spotlight search bar to start DiffusionBee. It will download some models when it starts for the very first time.
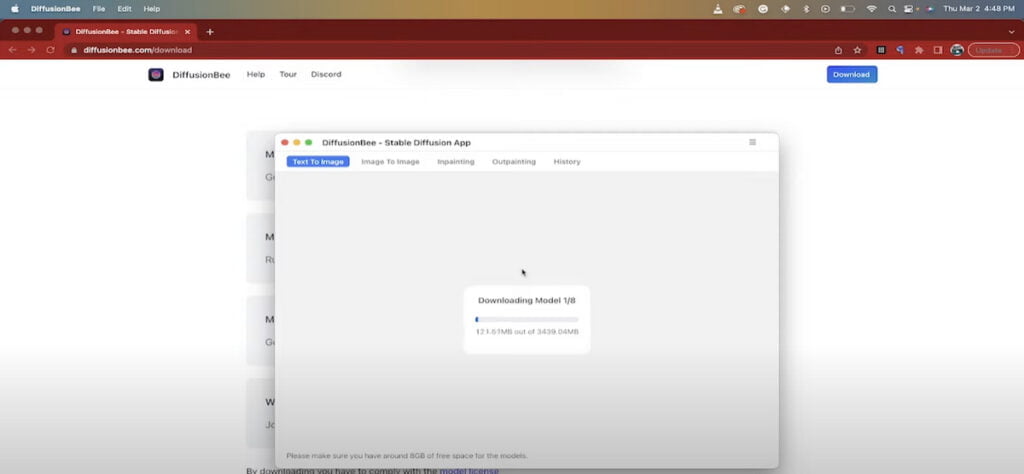
5. Now you can start testing DiffusionBee. Try its features such as Text to Image, Image to Image, Inpainting, Outpainting, and more.
How to Install Stable Diffusion on Linux
Installing Stable Diffusion on Linux and Ubuntu involves a few steps that can vary slightly depending on the method or version you choose to install.
Below is a more popular method to install Stable Diffusion on Linux, using Easy Diffusion.
1. Start by downloading the installation file for Stable Diffusion. The file can be found online, and once downloaded, it will be saved on your Linux system.
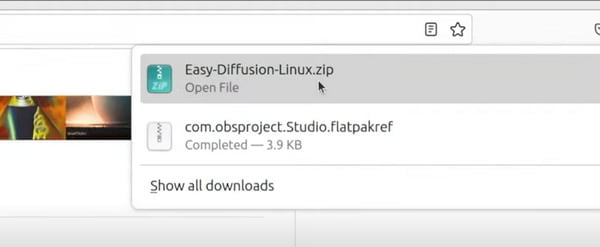
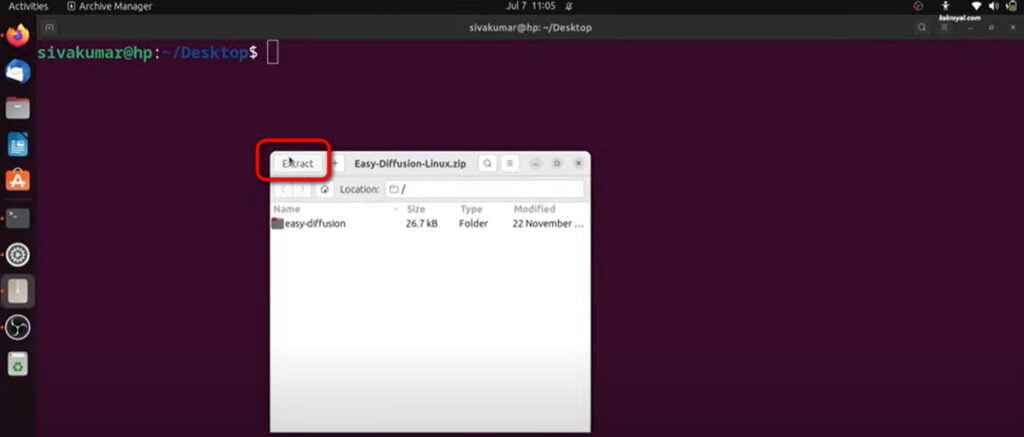
2. Use your preferred file manager to extract the file or run the following command in a terminal to unzip the file:
bash
unzip Easy-Diffusion-Linux.zip
After extraction, navigate to the easy-diffusion directory.
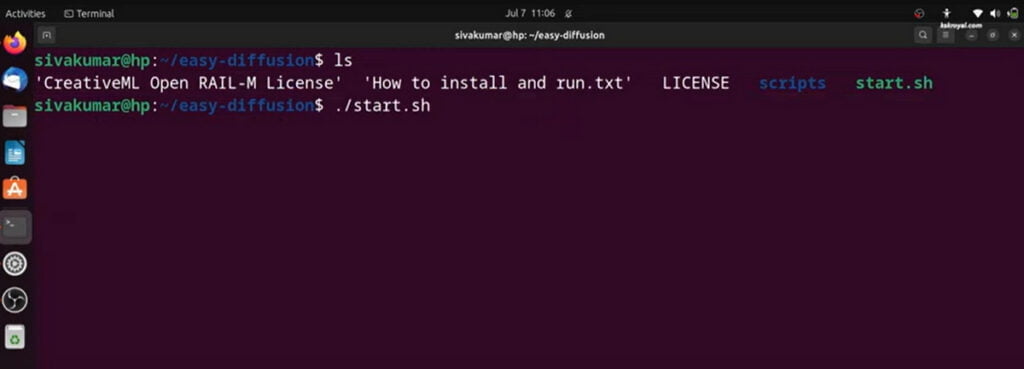
3. Open your terminal and navigate to the directory containing the Stable Diffusion files. To run Stable Diffusion in the terminal, use one of the following commands:
bash
./start.sh
or
bash
bash start.sh
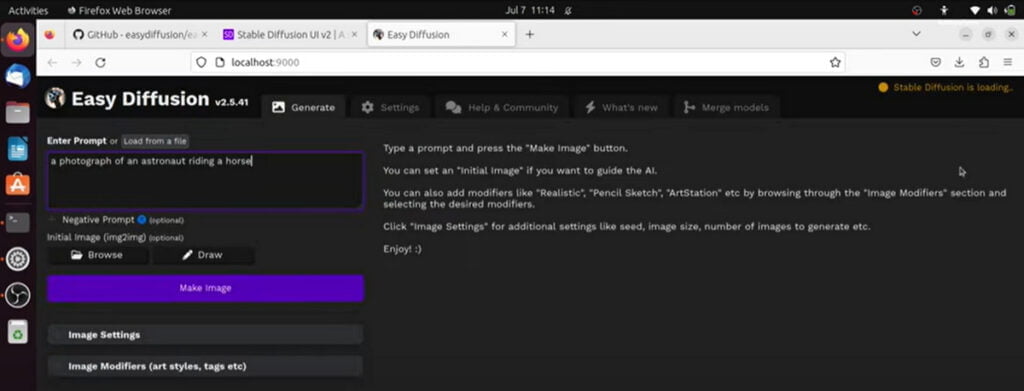
4. When the installation completes, the Web UI will open in a browser window, refresh the page and you’ll see Stable Diffusion installed and running on your Linux system.
Additional Notes
Model Checkpoint Files: Depending on the version of Stable Diffusion you wish to use (e.g., 1.4, 1.5, 2.0), you will need to download the corresponding .ckpt file from sources like Civitai and Hugging Face and place it in the specified directory.
Compatibility and Performance: While Stable Diffusion can run on various operating systems, some users report better performance on Linux due to its efficient handling of the necessary computational resources.
FAQs
What are the benefits of running Stable Diffusion locally versus using it online?
Running Stable Diffusion locally gives you more control over the generation process, allows for customization, and can be more private since you’re not uploading data to an external server. It also enables you to use all features of the model, which might be restricted in online versions.
Where do I place the Stable Diffusion model file?
After downloading the Stable Diffusion model file, you need to move it to the models folder inside the stable-diffusion directory.
How do I run Stable Diffusion?
To run Stable Diffusion, you need to access the Web-UI through a local URL, typically http://127.0.0.1:7860/. From there, you can input a prompt and hit Generate to test if Stable Diffusion is running correctly.
Can I install Stable Diffusion for offline use?
Yes, it’s possible to install Stable Diffusion for offline use. You can download all the necessary files and store them on a USB for installation on another PC. However, this process can be complex and may require additional steps, such as installing a portable version of Stable Diffusion.
Are there any options to speed up Stable Diffusion?
Yes, you can speed up Stable Diffusion with the –xformers option. This is particularly useful if you have less than 8 GB VRAM on your GPU. Additionally, if you want to use your computer as a server and access the GUI with another computer, you can use the –listen argument to enable a connection from another computer.
Where can I find the Stable Diffusion model weights?
Model weights can be downloaded from various sources, and you should ensure you have accepted the Stable Diffusion license before doing so. Higher version numbers of the checkpoints generally perform better as they have been trained on more data.
Can I run Stable Diffusion on a CPU instead of a GPU?
Yes, it is possible to run Stable Diffusion on a CPU, but the performance will be significantly slower compared to using a GPU.

![Read more about the article The 17 Best Android Emulators for PC and Mac [All Free]](https://motricialy.com/wp-content/uploads/2023/01/android-emulator-for-pc.jpg)

