![You are currently viewing How to Install Stable Diffusion Using Easy Diffusion [Step by Step]](https://motricialy.com/wp-content/uploads/2023/07/easy-diffusion.jpg)
Easy Diffusion is a new GitHub project that allows you to install Stable Diffusion on Windows, Mac, and Linux in an easier way.
On this page, you’ll learn what Easy Diffusion is, what’s the difference between Easy Diffusion and Stable Diffusion, and follow the step-by-step guide to install Stable Diffusion on your device using Easy Diffusion.
👉You may also want to check our complete guide on how to install Stable Diffusion.
Table of Contents
What is Easy Diffusion
Stable Diffusion is a state-of-the-art AI art tool, and it’s ranked top among the best AI art generators. However, to use Stable Diffusion, you have to go with the troublesome local installation process, and it requires a decent GPU on your computer.
Easy Diffusion is a Github project that aims to simplify the complex Stable Diffusion local installation, which requires basic Python code skills. And it’s based on the CompVis version of Stable Diffusion and cmdr2 stable diffusion UI.
Before Easy Diffusion, non-tech savvy users have to turn to Stable Diffusion on Google Collab or Stable Diffusion websites to use Stable Diffusion models easily.
Now with Easy Diffusion, the most inexperienced users can easily install and run Stable Diffusion locally with a few clicks.
Easy Diffusion Hardware Requirements
Windows: NVIDIA graphics card (minimum 2 GB RAM), or run on your CPU.
Linux: NVIDIA or AMD graphics card (minimum 2 GB RAM), or run on your CPU.
Mac: M1 or M2, or run on your CPU.
Minimum 8 GB of system RAM. At least 25 GB of space on the hard disk.
How to Install Stable Diffusion on Windows Using Easy Diffusion
In the following tutorial, you’ll learn the detailed steps to install Stable Diffusion on Windows, Mac, and Linux, using Easy Diffusion.
Step 1. Go to the Easy Diffusion Github Page
Go to Easy Diffusion on Github (formerly Easy Diffusion 2.5), scroll down to the download section, and download Easy Diffusion according to your system. We’ll use Easy Diffusion for Windows for demonstration.

Step 2. Go to the Download Folder
Open up the File Explorer and go to the Download folder on your PC. The file path by default is C:\Users\Administrator\Downloads
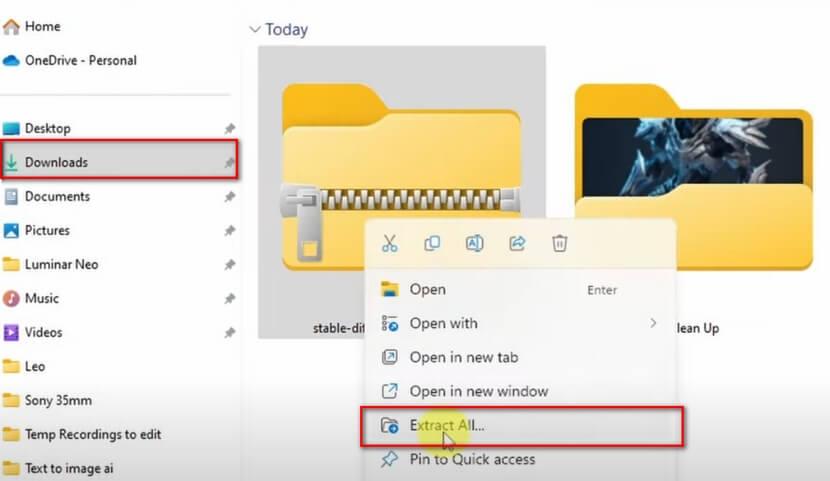
Step 3. Unzip the Downloaded Folder
Right-click on the stable-diffusion-ui-windows.zip file, and unzip/extract it in the downloaded folder. Then move the extracted folder to any disk drive you prefer. I’m going with the local disk drive C.
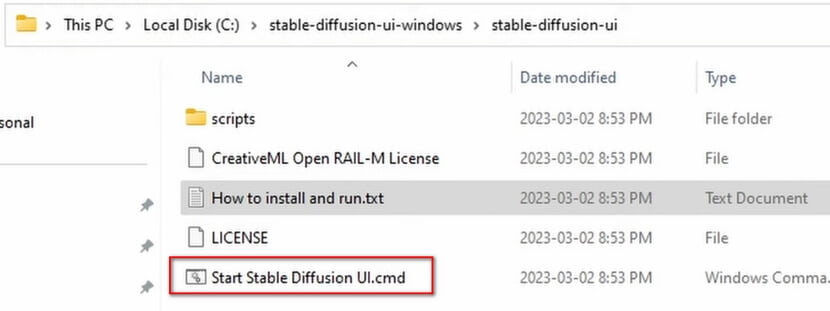
Step 4. Run Start Stable Diffusion UI CMD
Go to the stable-diffusion-ui-windows folder > stable-diffusion-ui folder > and run the Start Stable Diffusion UI.cmd file. Which is to use the command line to automatically install Stable Diffusion on your computer.
Step 5. Authorize Easy Diffusion
If the Microsoft Defender SmartScreen window pops up, click More info > Run anyway.

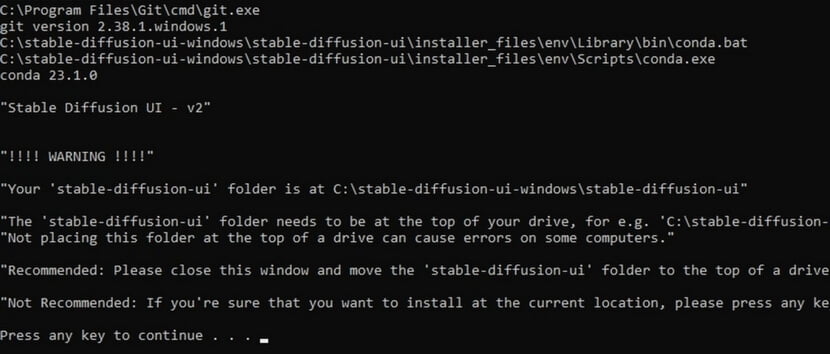
Step 6. Press Any Key on the Keyboard
In the Command Prompt, as suggested, press any key on the keyboard to continue, and the Stable Diffusion installation by Easy Diffusion will start automatically.
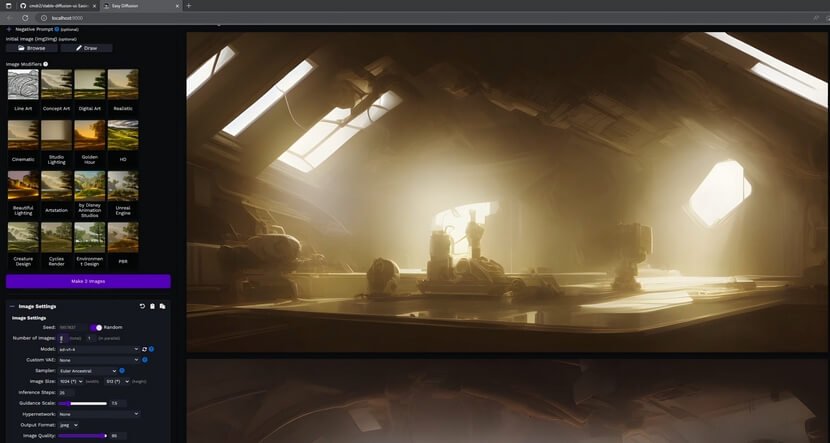
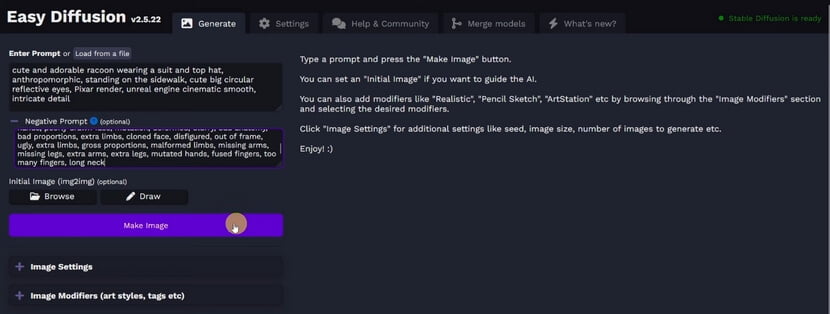
Step 7. Using Easy Diffusion UI
Wait patiently for a few minutes, and when the installation completes, the Easy Diffusion web UI in a browser will pop up, and you can now start using Stable Diffusion!
How to Update the Easy Diffusion Model
As of the writing of this post, Easy Diffusion uses Stable Diffusion 1.4 model, and you update it to the more popular Stable Diffusion 1.5 or Stable Diffusion 2.1 models, or any other custom-made stable Diffusion models.
To do so,
Step 1. Go to Civitai or Hugging Face to download your favored model.
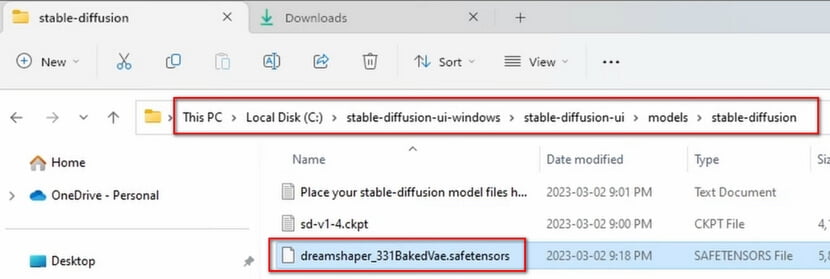
Step 2. Go to the stable stable-diffusion-ui-windows folder > stable-diffusion-ui folder > models > stable diffusion.
Step 3. Drag and drop the downloaded model into that folder.
How to Install Easy Diffusion on Mac and Linux
Step 1. Go to your device’s Download folder, and unzip the easy-diffusion file.
Step 2. Open a terminal window and navigate to the easy-diffusion directory.
Step 3. Run ./start.sh (or bash start.sh) in a terminal.
How to Uninstall Easy Diffusion
To uninstall Easy Diffusion, you simply need to crisp delete the stable-diffusion-ui-windows folder.
Easy Diffusion vs Stable Diffusion
Apparently, the most notable difference between Easy Diffusion and Stable Diffusion is that the former gets rid of the daunting installation process of Stable Diffusion, involving Python codes and Automatic 1111 web UI, which makes average users enjoy Stable Diffusion with ease.
Apart from that, Easy Diffusion also offers some unique features such as:
- Live Preview is used to stop image generations during the rendering process
- Task Queue that is helpful in managing batch image generations
- User-friendly UI that is massively improved from Automatic 1111
- NSFW Setting to easily toggle on and off NSFW option in Stable Diffusion
- In-Painting helps specifies areas in images to fill
- Image Modifiers that is an in-built library of tags to experiment with various styles
- 1-click Upscale/Face Correction, just as the name suggests
- Custom models that support external .ckpt or .safetensors files
- And a whole lot more
Legal Disclaimer: This article is for general informational and educational purposes only. We (Motricialy.com) are in no way endorsing, distributing, collaborated with, affiliated with, or in possession of any of the mentioned applications or services, which might contain links to third-party content. The end-user shall be solely responsible for the content accessed.


The instructions for installing easy-diffusion on a Mac say to “navigate to the easy-diffusion directory”. What does this mean and how can I do it?
Hi Chuck, from the terminal window, type cd /Users/yourusername/Documents to go to your easy diffusion folder.